Overview
Provisioning packages are such a treat in the Windows 10 environment. What can we do with them? here is just a few things:
- Configure many devices efficnetly without the need for new deployment images
- Configure devices without the need for Multiple Device Management (MDM)
- Configure multiple devices simultaneously
- Configure devices that are not connected to the corporate network
Management tasks made simple include:
- App deployment
- Enroll devices with MDM
- Distribute certificates
- Deploy connectivity profiles
- Apply device polices
Package Creation
How do you create provisioning packages? Download the Windows Assessment and Deployment Kit (ADK). This kit includes the Windows Imaging and Configuration Designer (ICD) tool.
The steps for package creation are as follows:
Step 1: In the ICD tool, choose File > New Project.
Step 2: In the New Project window, provide a name for your project, choose the project folder, and provide an optional description. Choose Next.
Step 3: Choose Provisioning Package and choose Next.
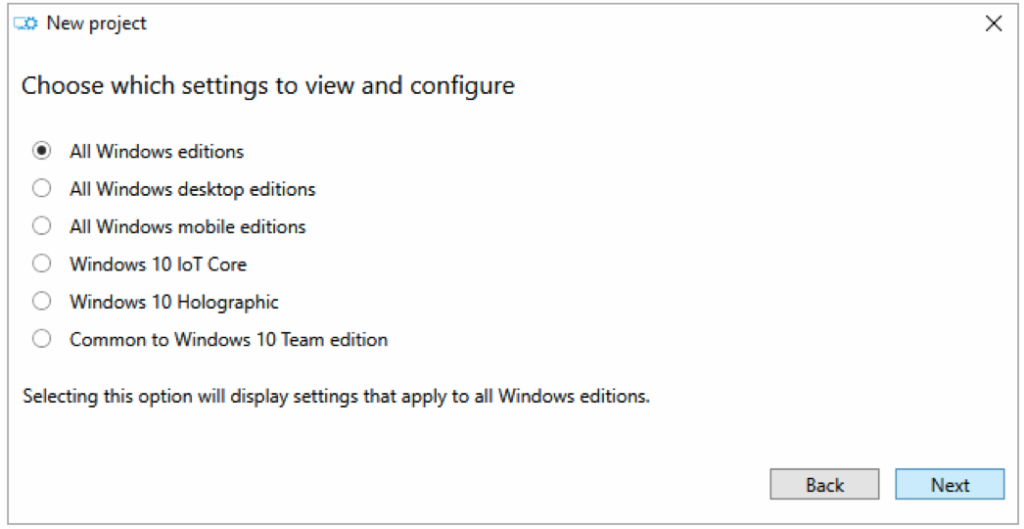
Step 4: Select the settings to view and configure as shown in the figure below and choose Next.

Step 5: Choose Finish on the Importing a provision packet (optional) screen.
You now have the ability to choose which customizations to make to Windows via the provisioning package.
Once you have made your modifications, choose Export in the ICD to run a wizard to export your provisioning package. For installation on systems, you now have two options:
- Deployment time – bake the provisioning package into the Windows image you plan to deploy
- Runtime – make the provisioning package available on a network share and instruct users to install